Preparation
- Please install “FlexTally Utility“.
- Please install “ATEM Software Control” and “ATEM Setup”.
- Make sure the Lamps are fully charged.
- Connect the Station and Lamps. Connection methods are here.
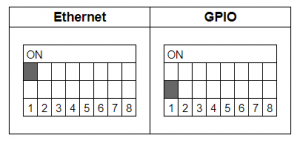
- Turn ON the No.1 DIP switch on the Station and change the connection method to Ethernet.
Setup Steps
- Set the DIP switches of each lamp for the channels to be used (please refer here for details).
- Connect the Station, ATEM and setup PC to the same LAN.
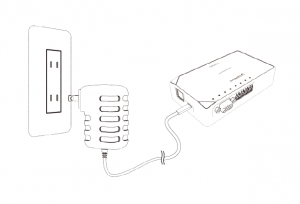
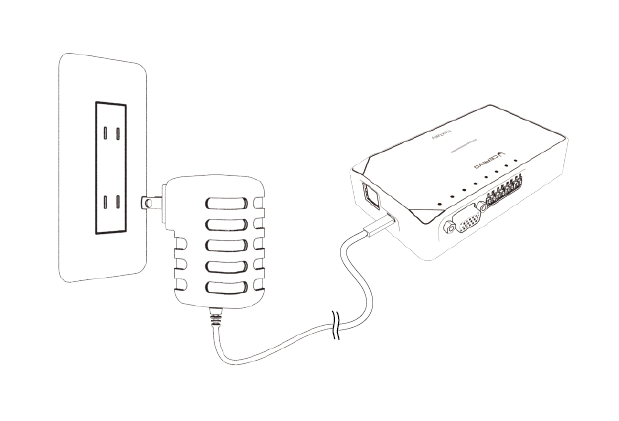
- Connect the AC adapter to the Station and turn it on. When the power turns on, the status LED lights up blue.
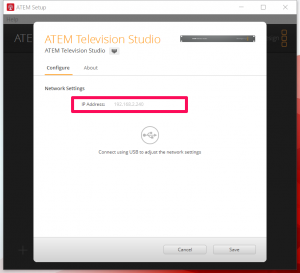
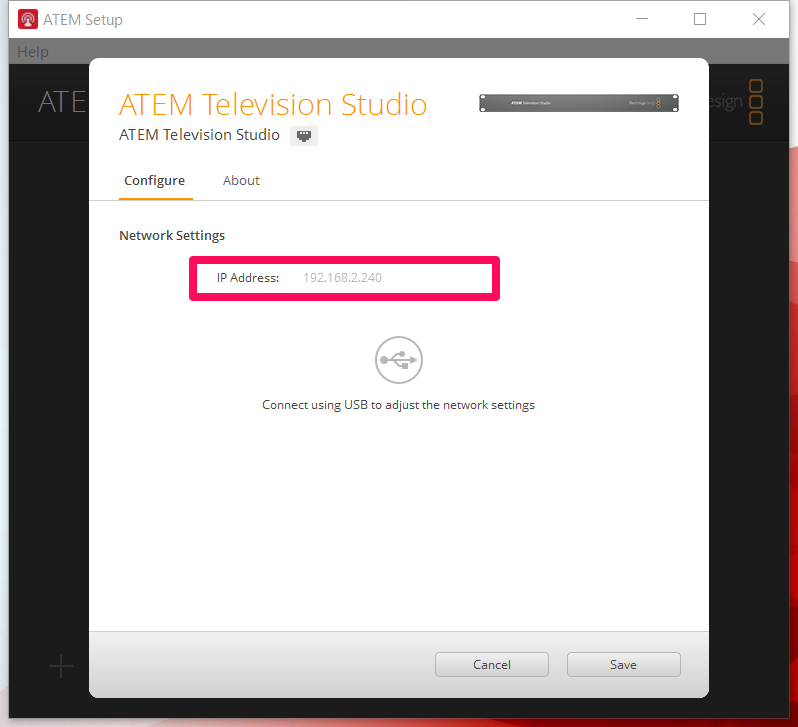
- Check the ATEM IP address from “ATEM Setup”.
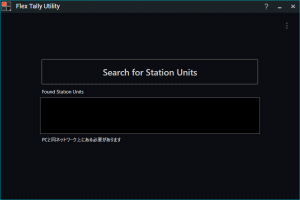
- Select “Search for Station Units” on “FlexTally Utility”.
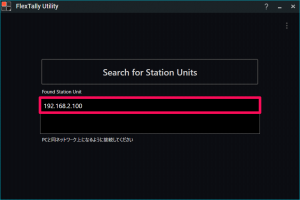
- When the station is found, the IP address of the Station will be displayed, click on the IP address.
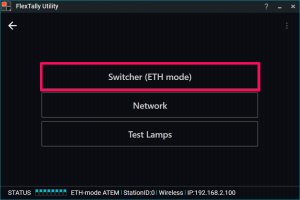
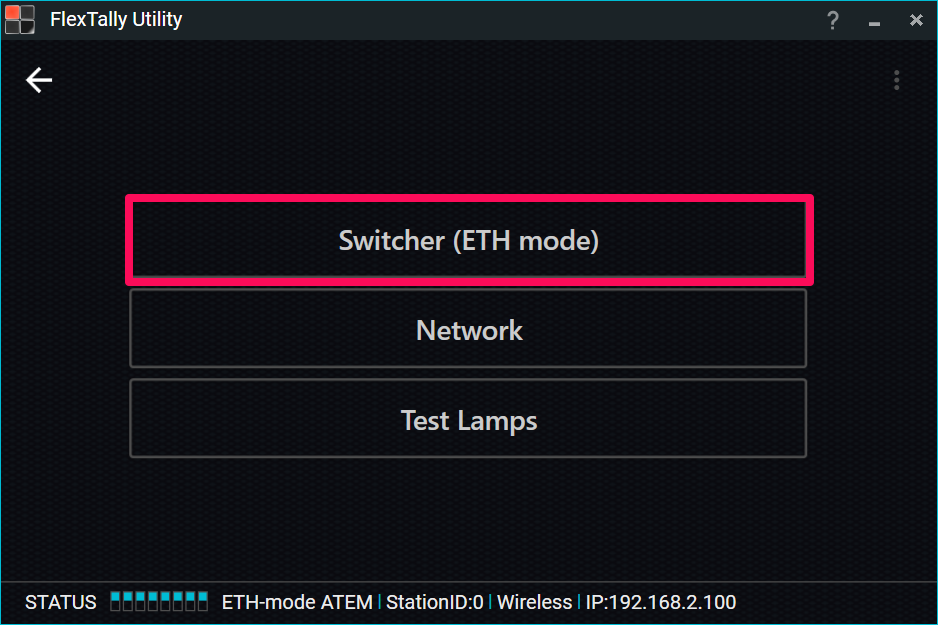
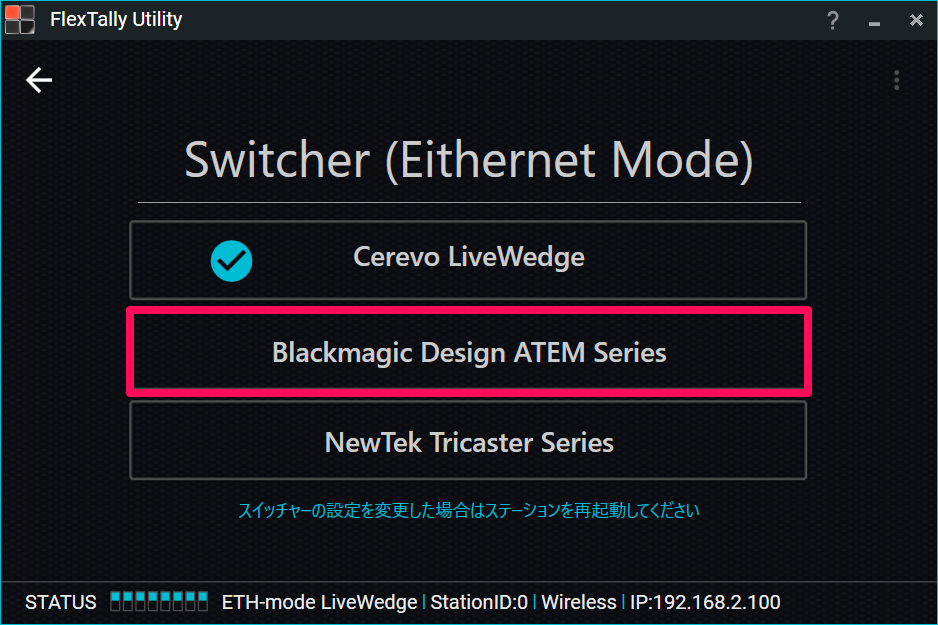
- Select “Switcher (ETH mode)”.
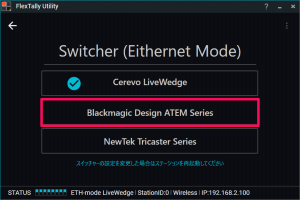
- Select “Blackmagic Design ATEM Series”.
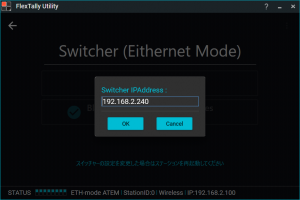
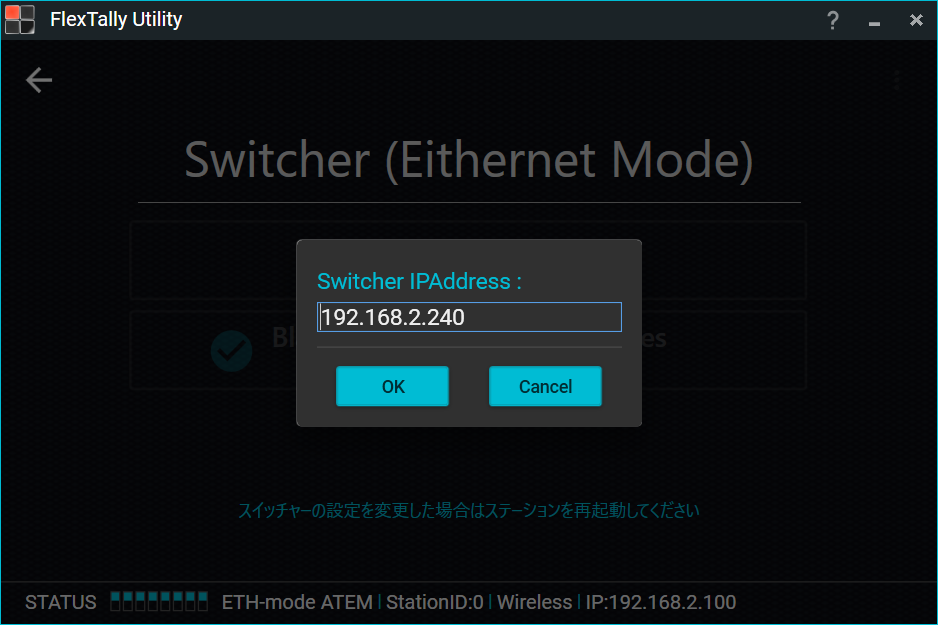
- Enter the ATEM IP address and click the OK button.
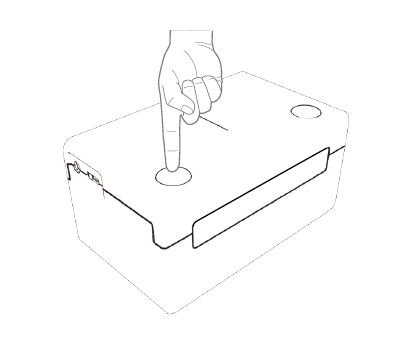
- Press and hold the power button on the Lamp. When the power turns on, the status LED lights up blue.

- Switch ATEM channels from “ATEM Software Control” and check that each Lamp reacts.


Note
- Since the “Test Lamps” option in “FlexTally Utility” is affected by the ATEM connection, please test when ATEM is not connected.