Preparation
- Install vMix on your PC.
- Prepare a setting PC. There is no problem if this is the same PC as the one on which vMix is installed.
- Install “FlexTally Utility” on the setting PC. Click here for installation instructions.
- Please update the FlexTally Station Unit firmware to the latest version. See here for how to update.
- Make sure the Lamp Units are fully charged.
- Connect the Station Unit and the Lamp Units. Connection procedures are explained here.
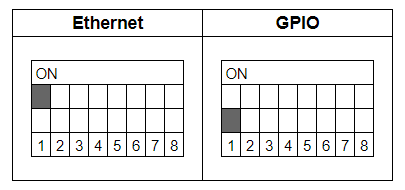
- Turn ON the No.1 DIP switch on the Station Unit and change the connection method to Ethernet.
Setup Steps
- Set the DIP switches of each Lamp Units to match the number of channels you want to use (please refer here for details).
- Make sure the FlexTally Station Unit, the PC which vMix is installed and the setting PC are in the same network.
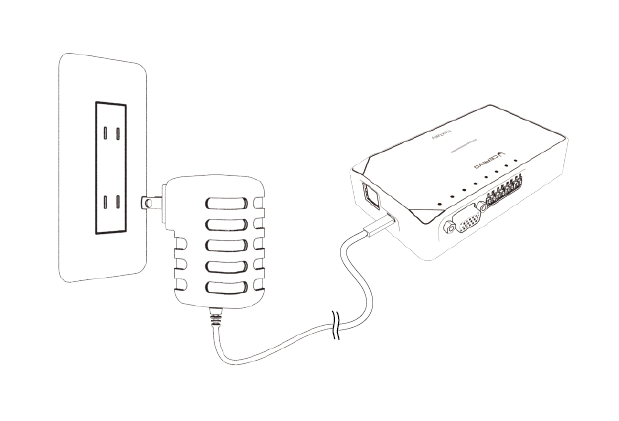
- Connect the AC adapter to the Station Unit and turn it on. When the power turns on, the status LED lights up blue.
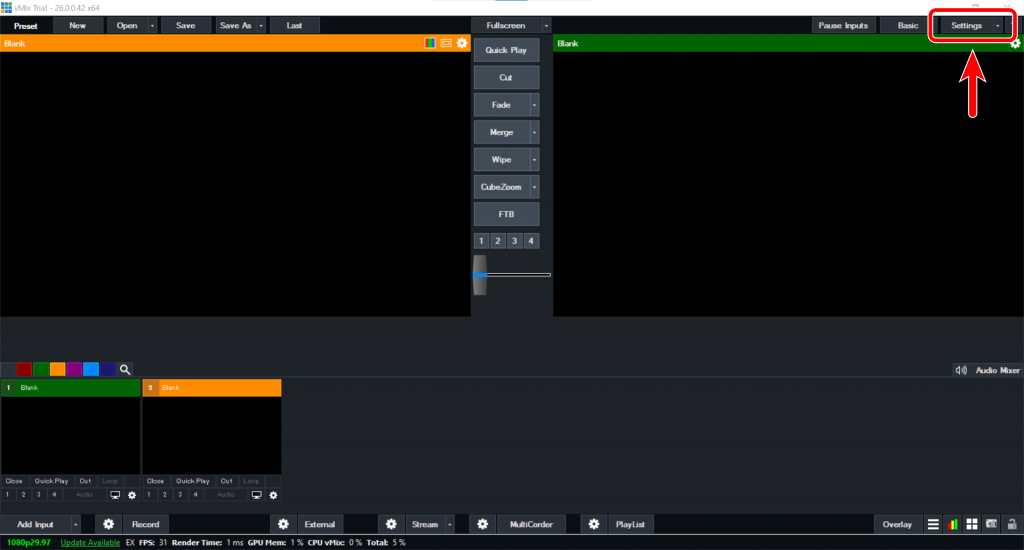
- Start vMix and select “Setting”.
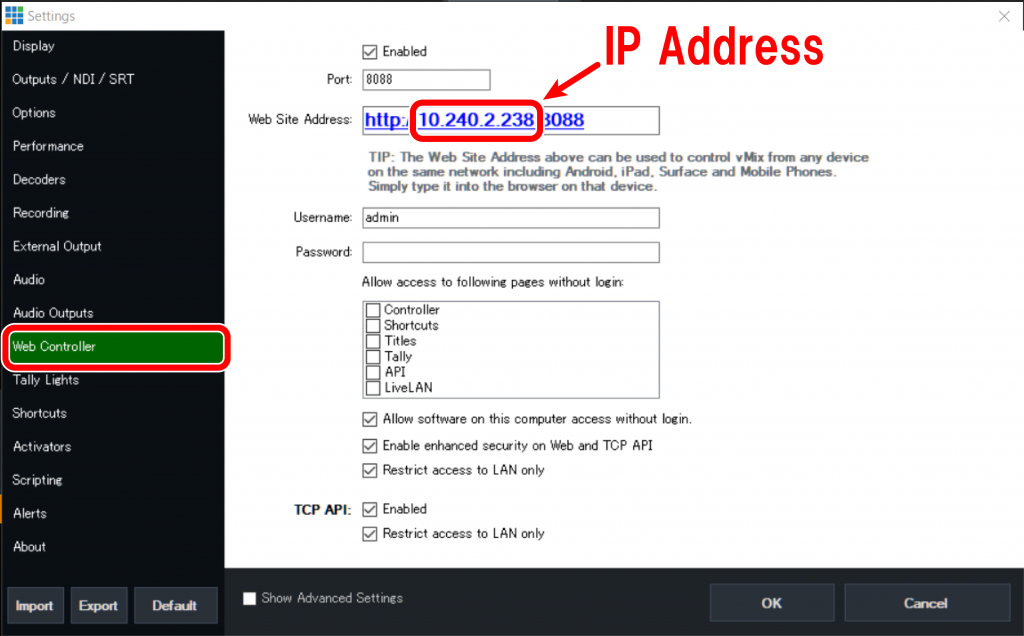
- Select “Web Controller” and find vMIX IP Address.
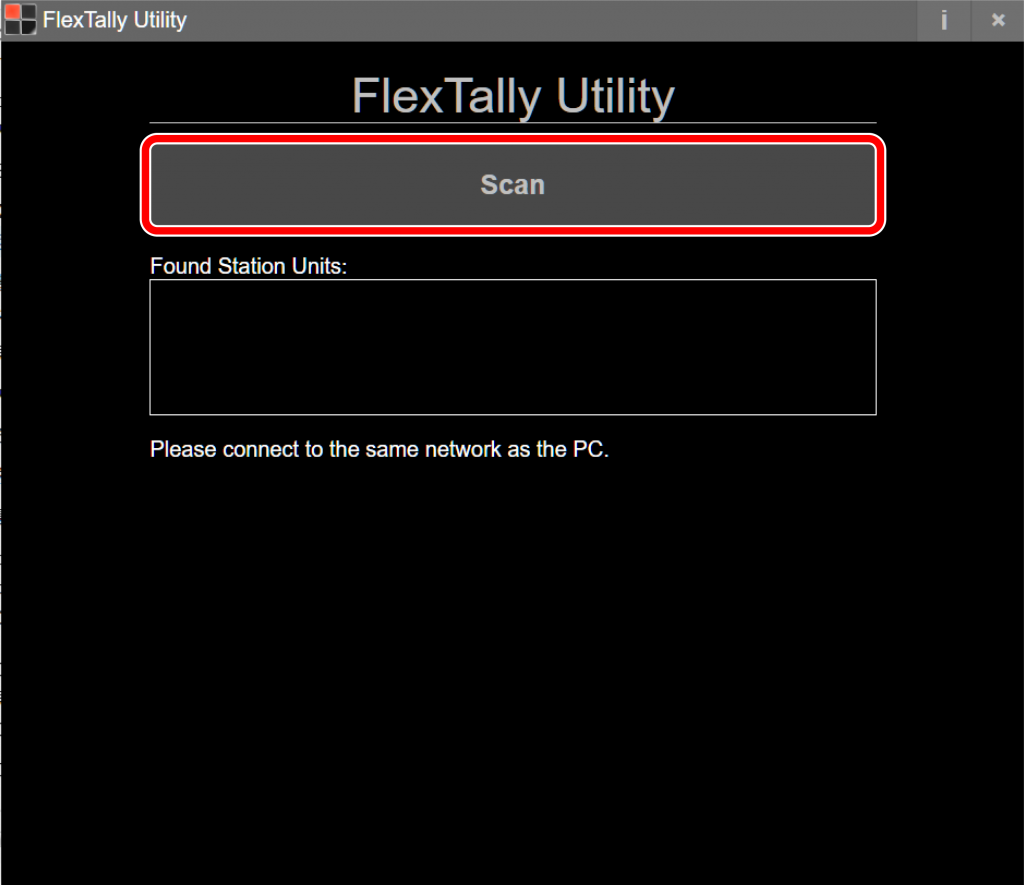
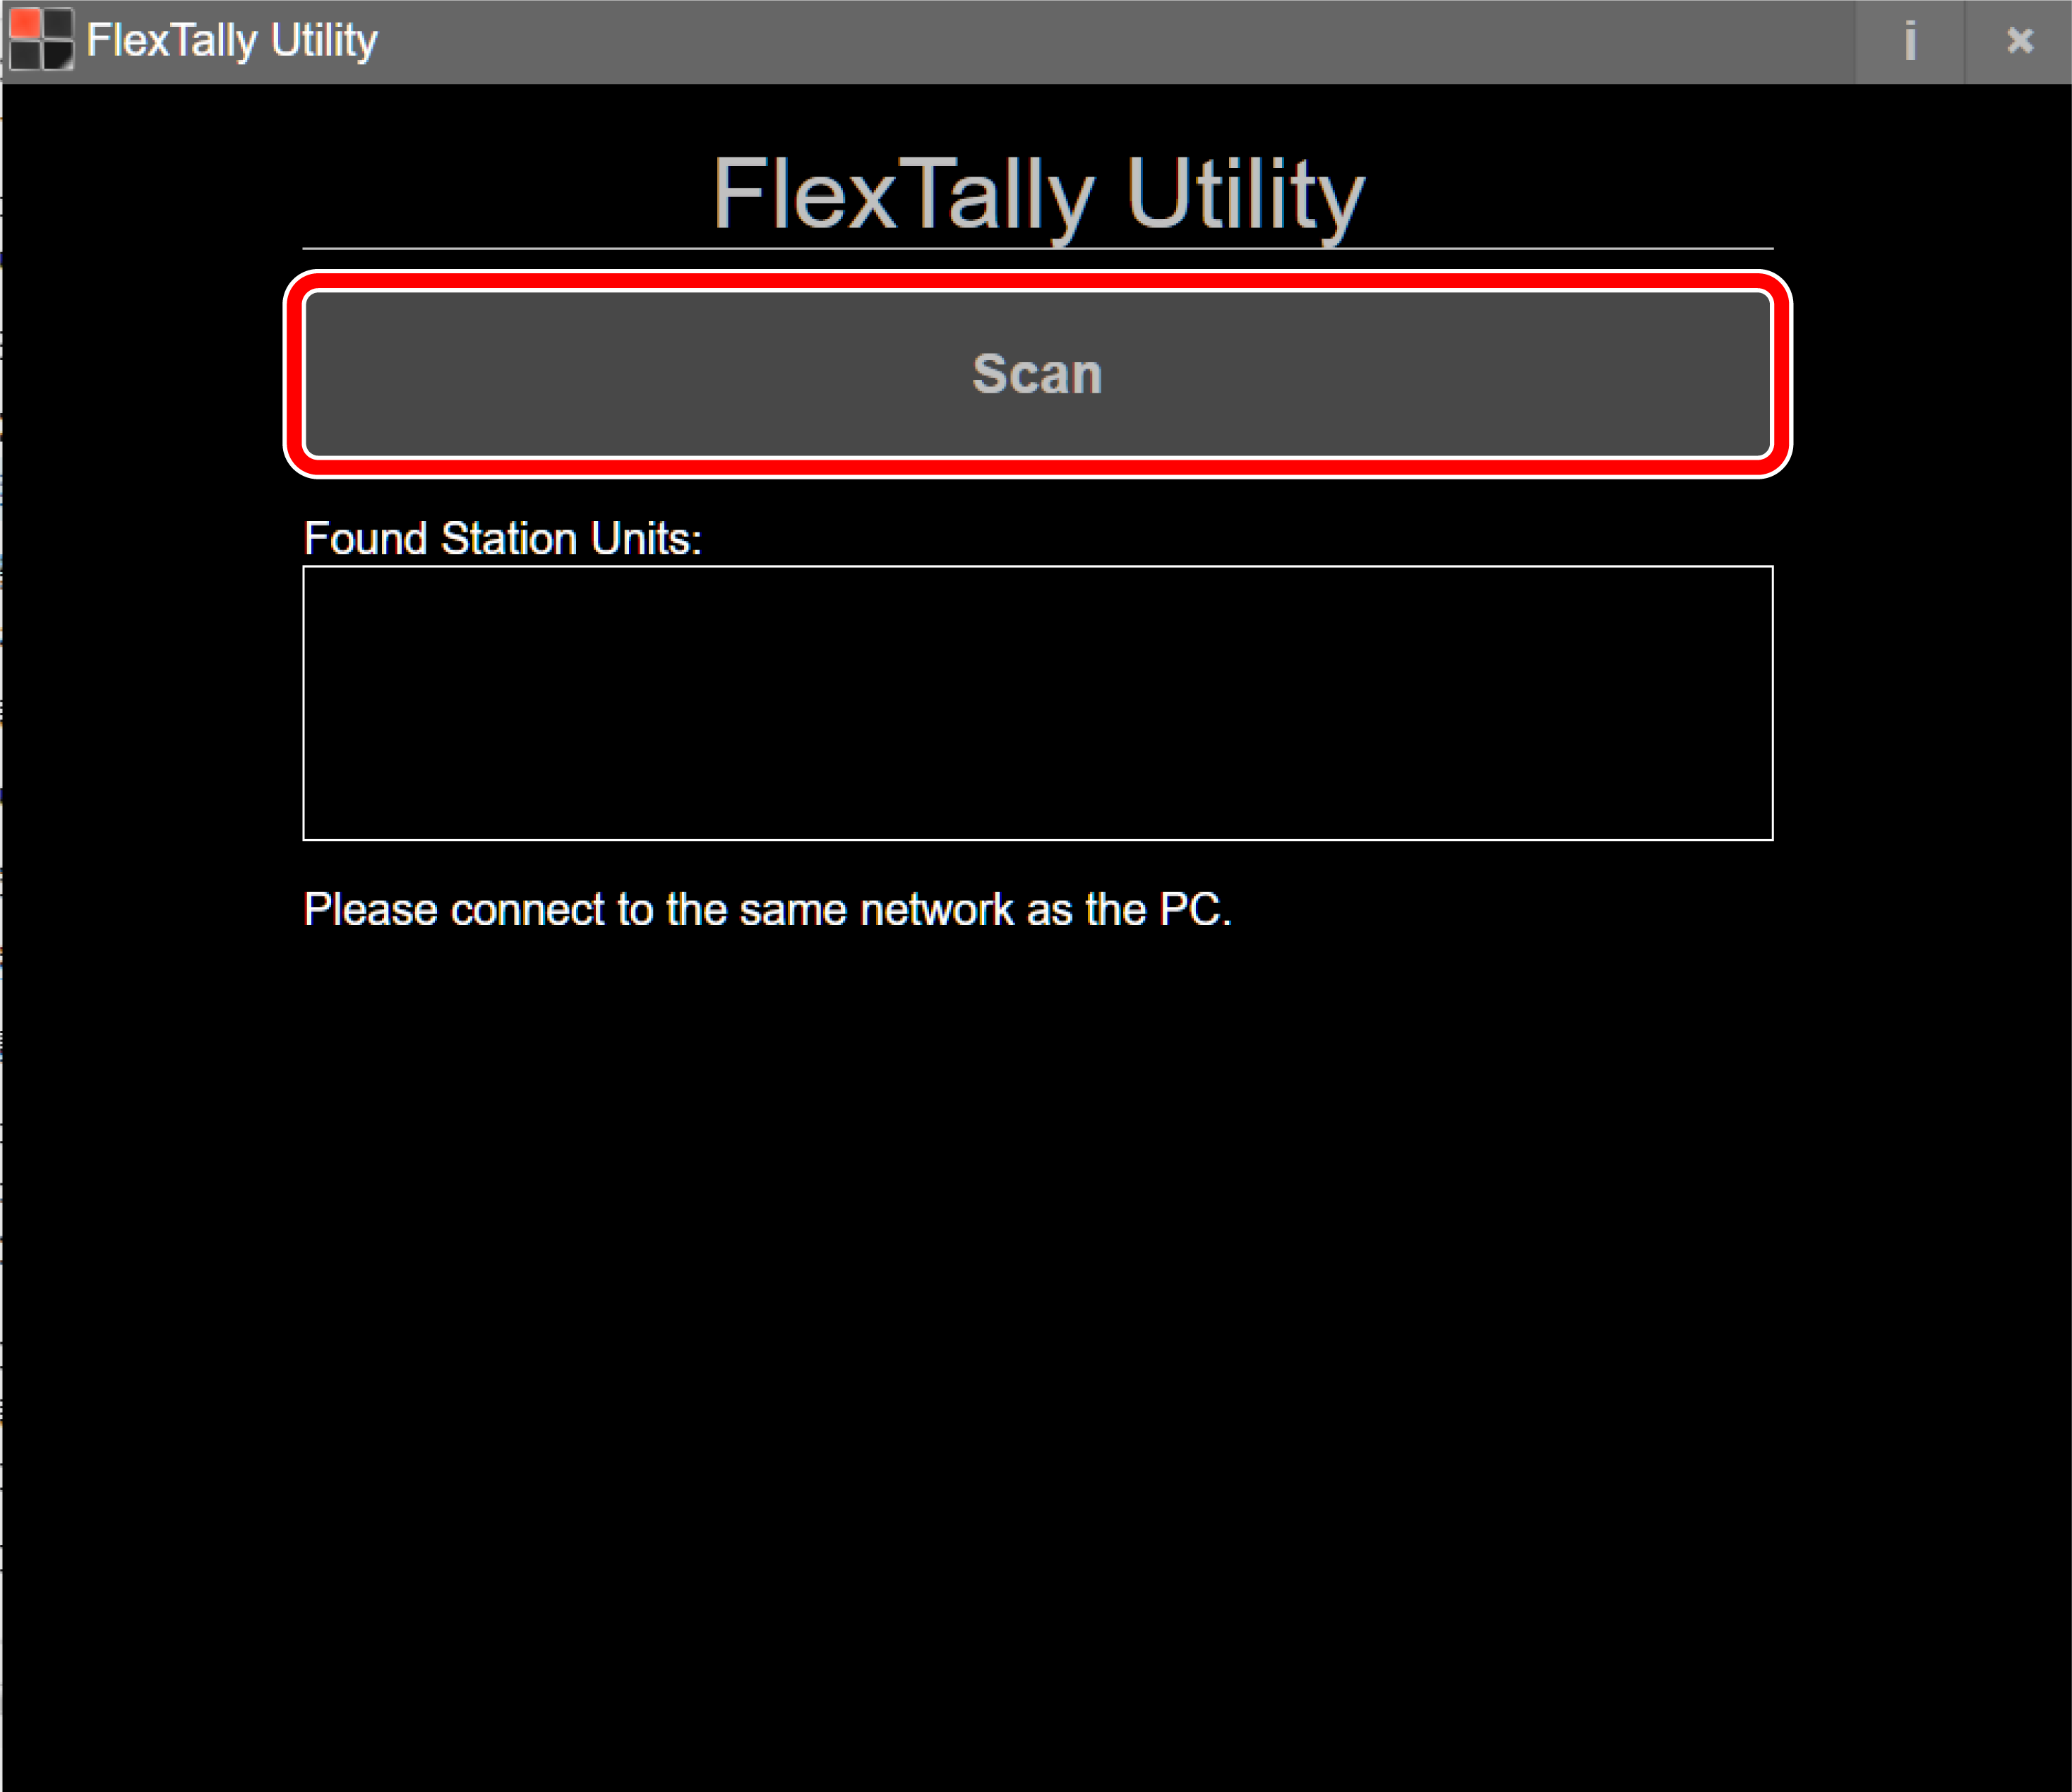
- Start FlexTally Utility and select “Scan”.
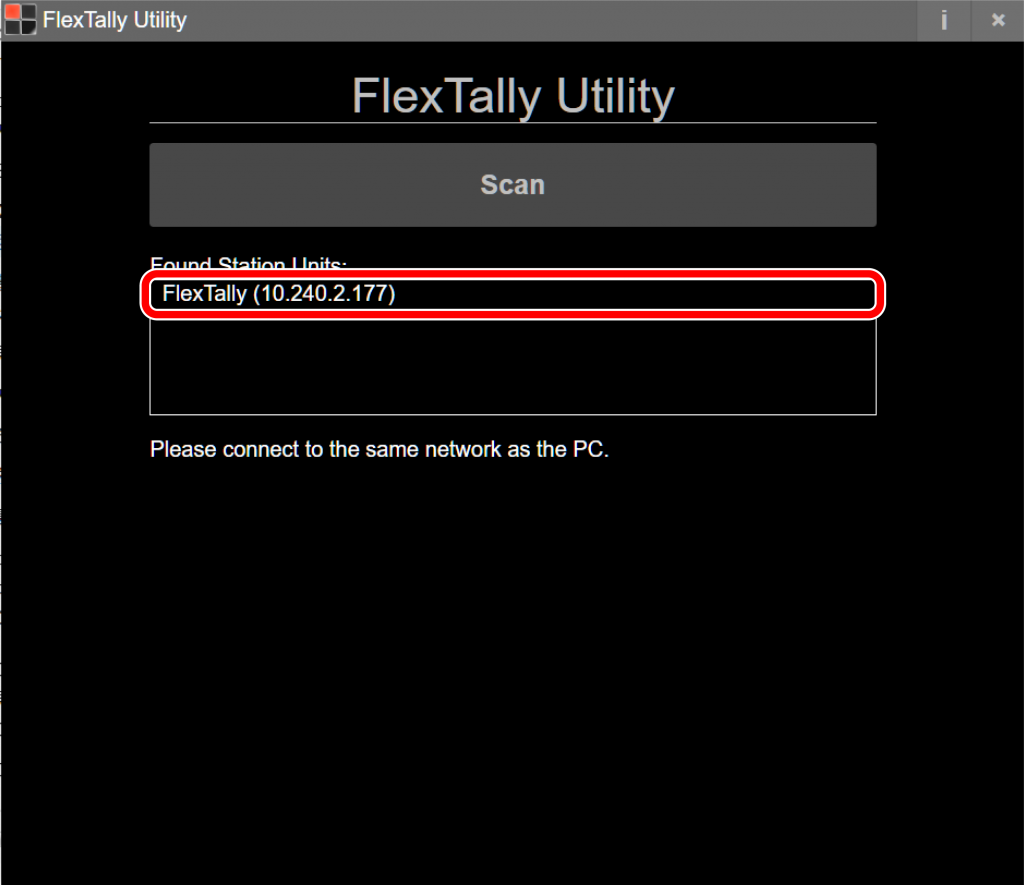
- When the station Unit is found, the IP address of the Station Unit will be displayed. Click on the IP address.
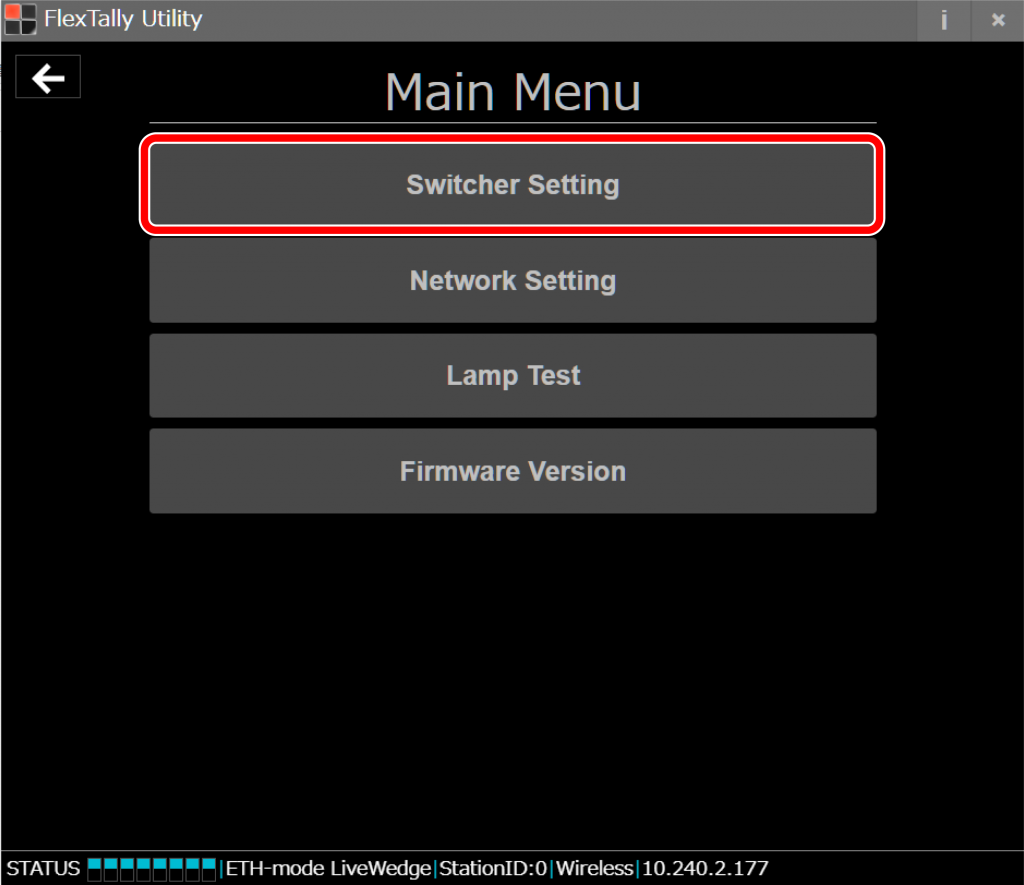
- Select “Switcher Setting”.
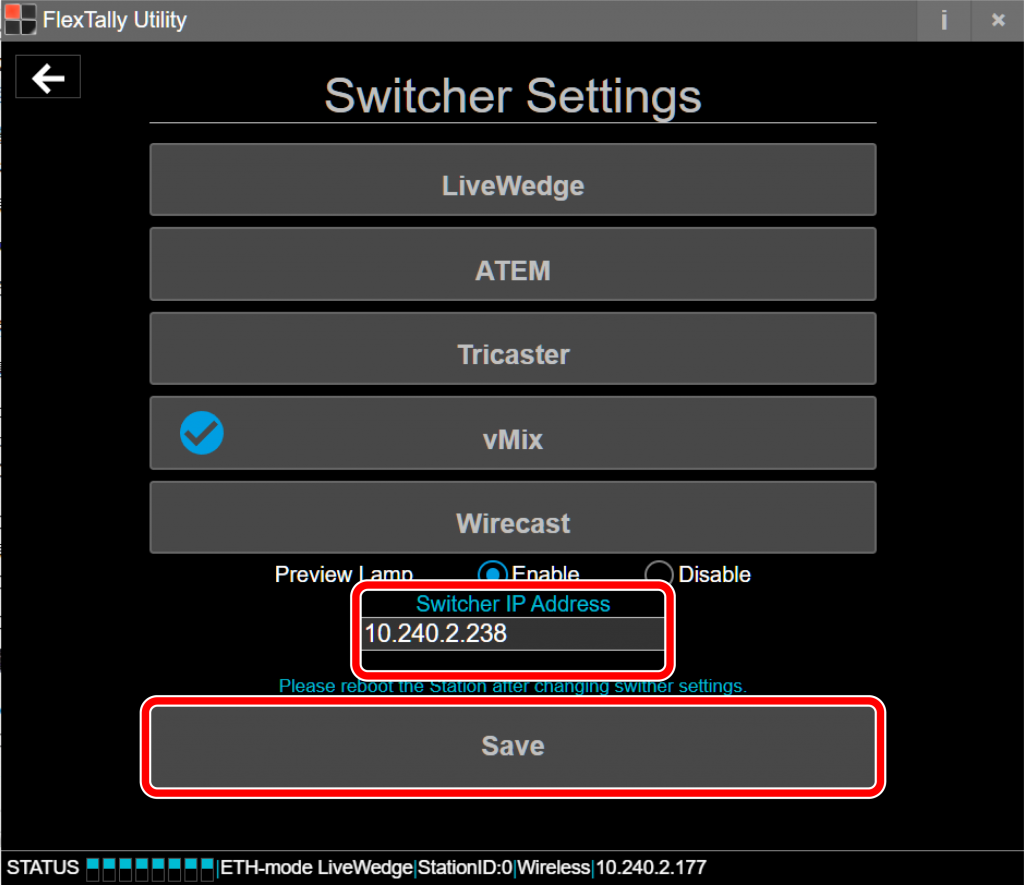
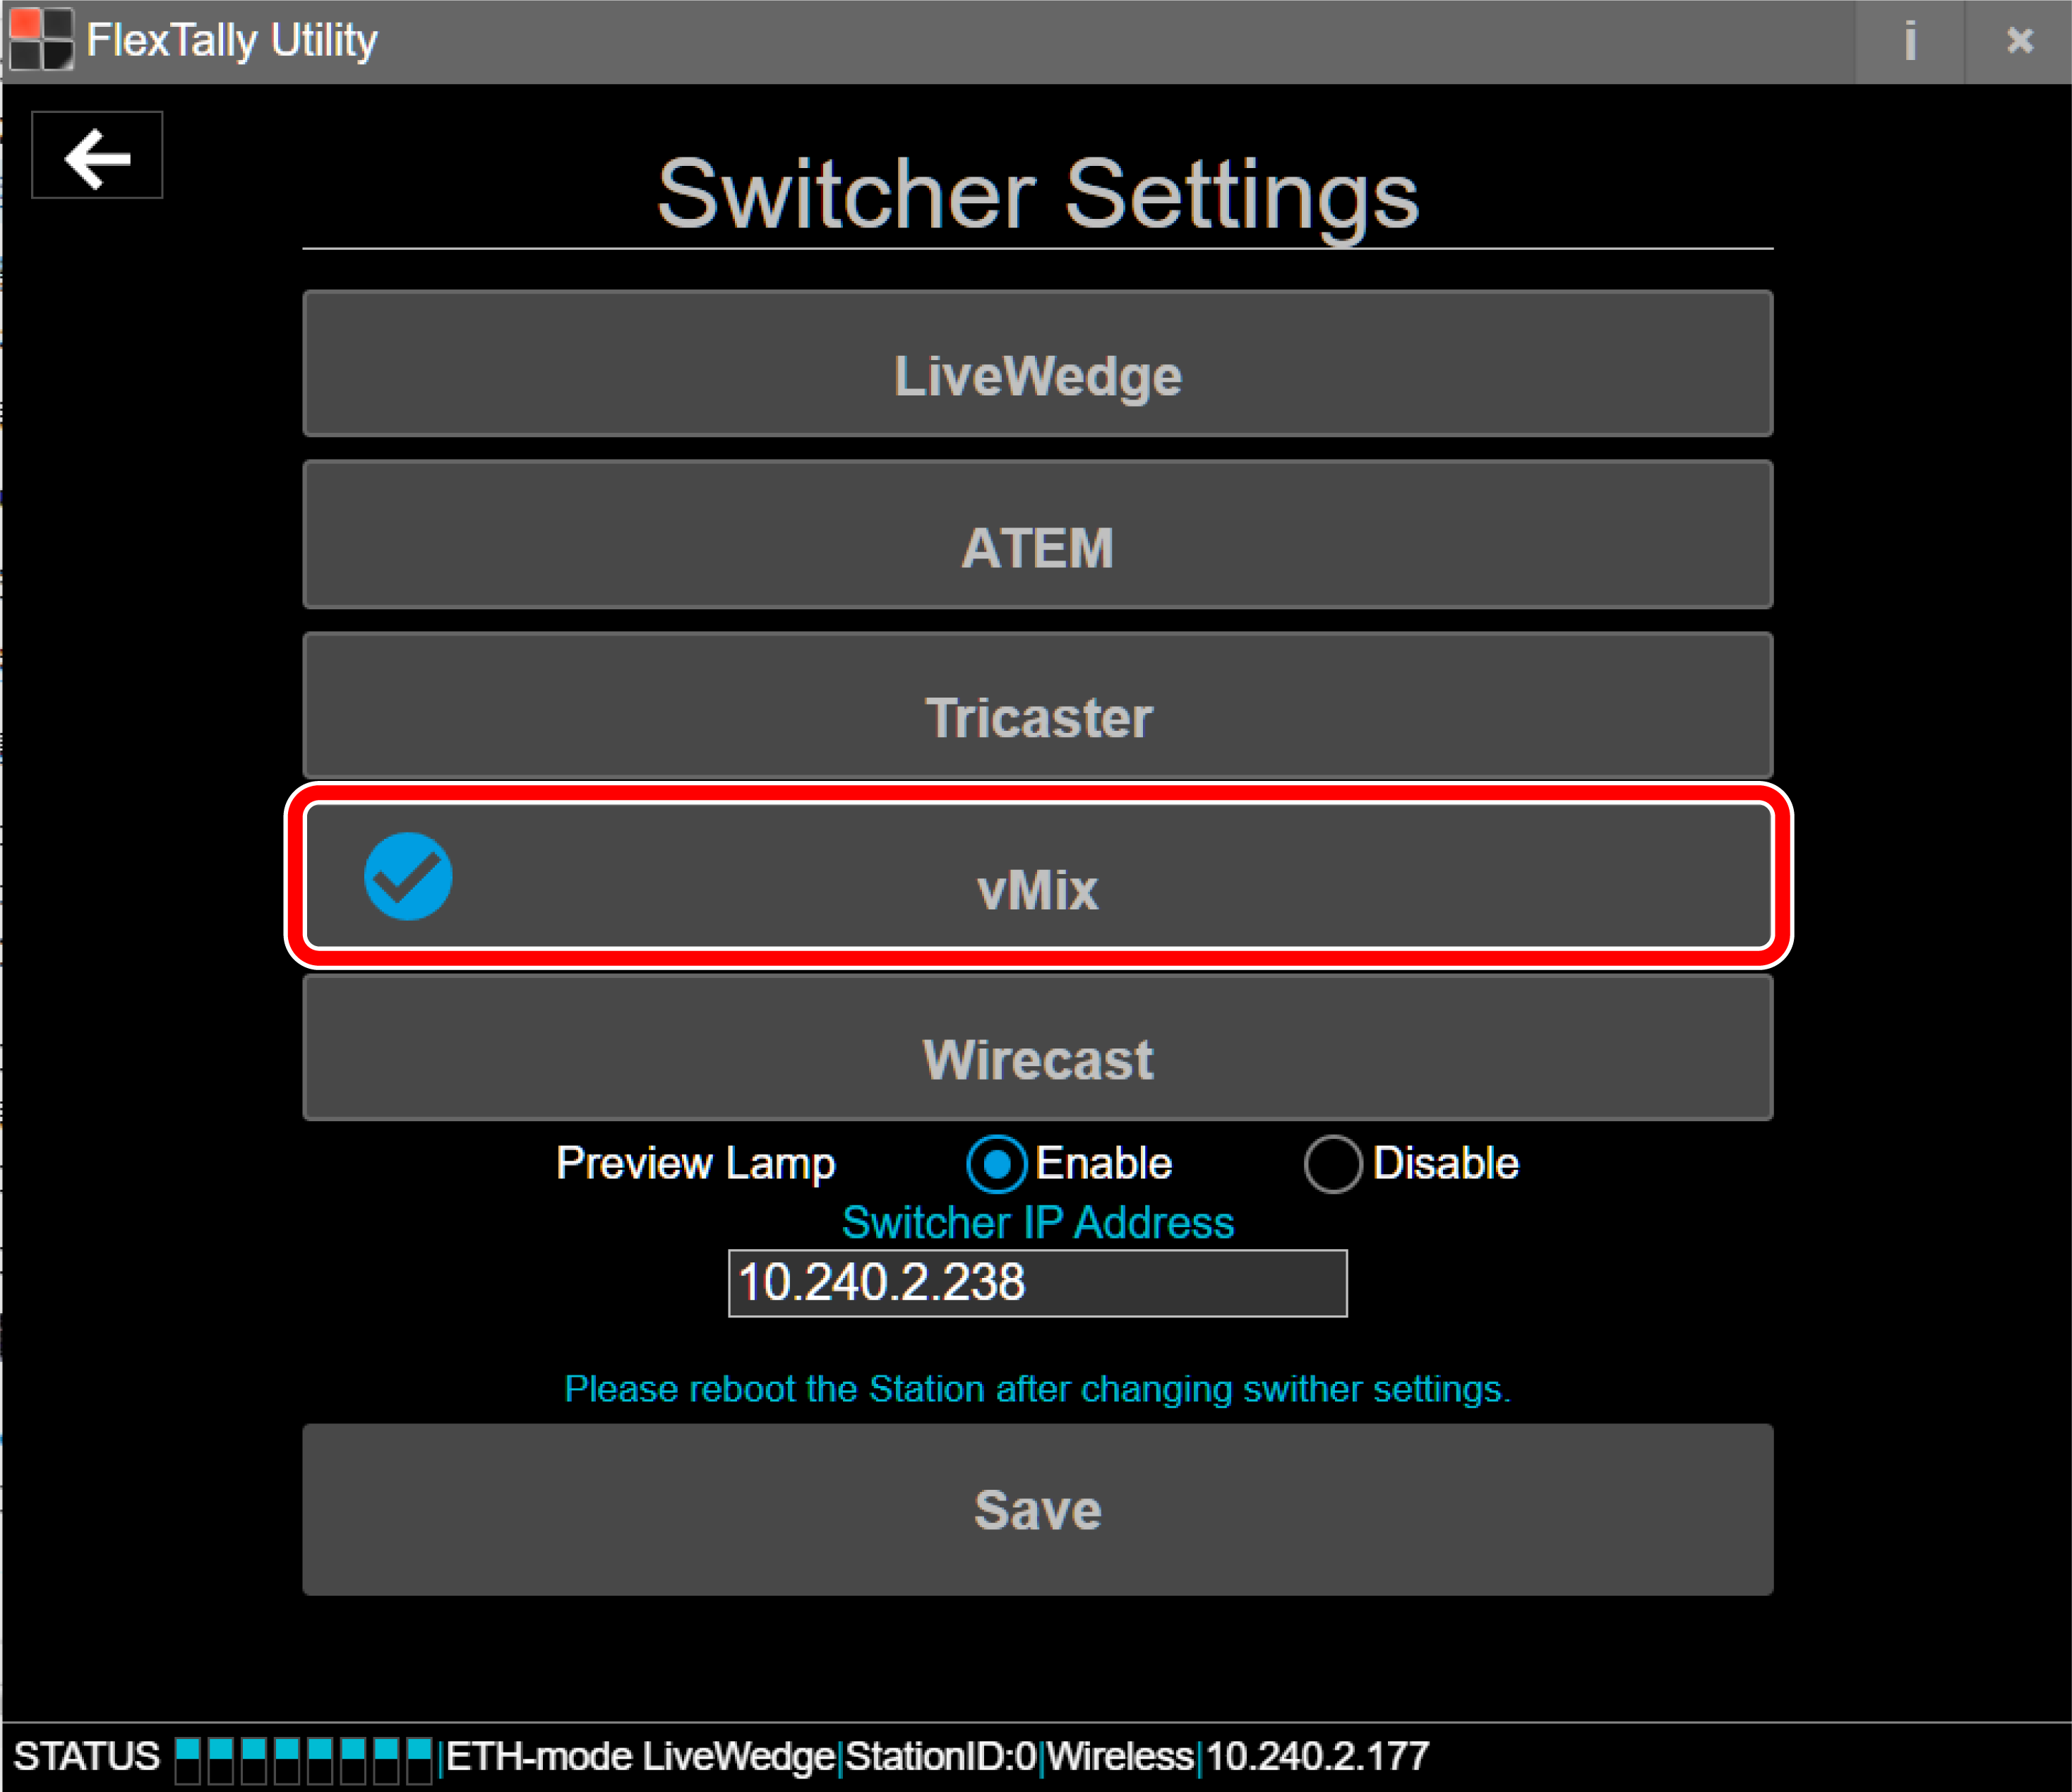
- Select “vMix”.
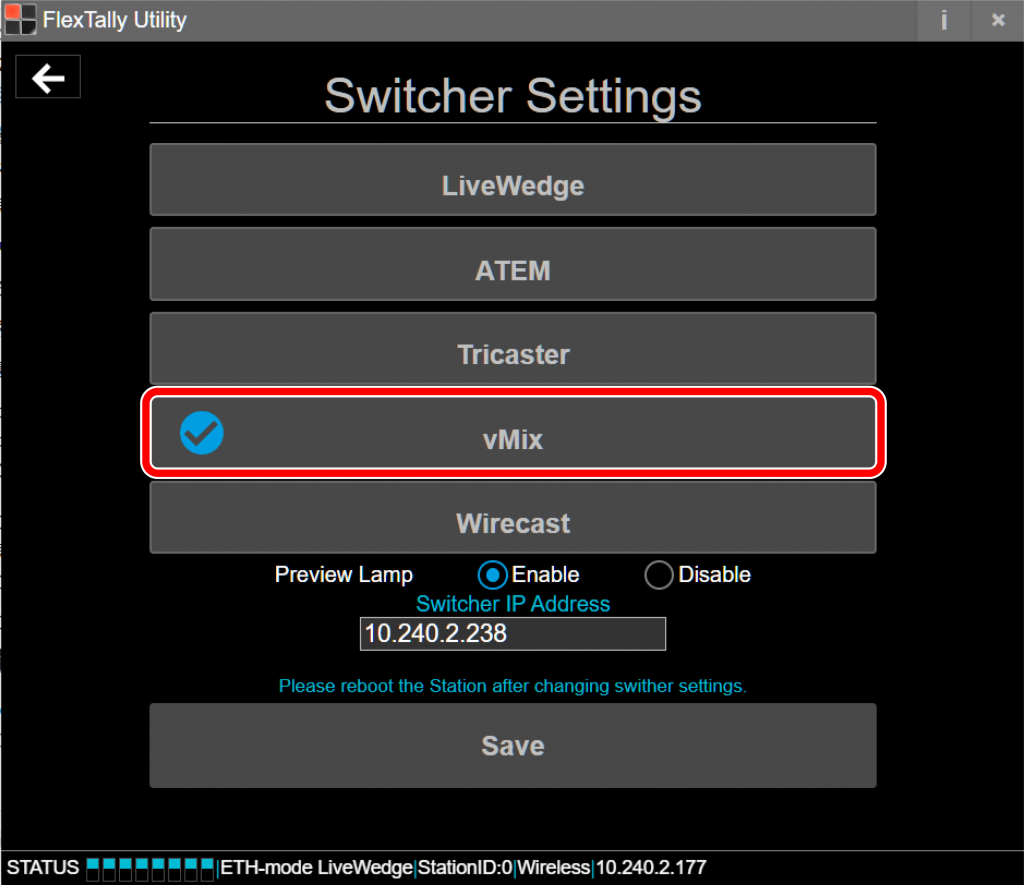
- Enter the vMix IP address at Step 5 at “Switcher IP Address” and click “Save”.
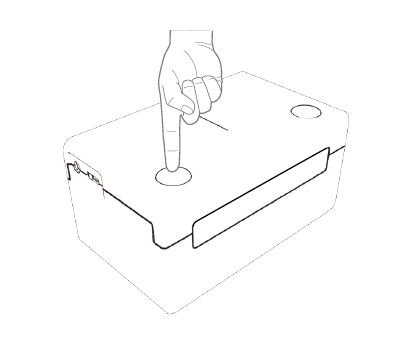
- Press and hold the power button on the Lamp Units. When the power turns on, the status LED lights up blue.
- Switch channels using vMix and check each the Lamp units response.


Note
- Since the “Test Lamps” option in “FlexTally Utility” is affected by the vMix connection, please test when vMix is not connected.